Organize your Okta TWDB Application Portal
This how-to describes how to organize and display your TWDB applications. TWDB is in the process of migrating all applications from APM to Okta. Please request help if you need assistance accessing an application.
Access your TWDB Application Portal
First, log into the TWDB Application Portal. You should see the TWDB applications displaying under a section called My Apps.

Update display preferences
-
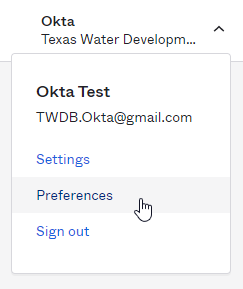
Click your name in the top right corner to display a dropdown with the options: Settings, Preferences, Recent Activity and Sign out. Click the Preferences option.
-
The Preferences option gives you the choice to display your sections and assigned applications in either a Grid View or a List View. The default view is the Grid View, and this is the view used in the rest of the how-to examples.
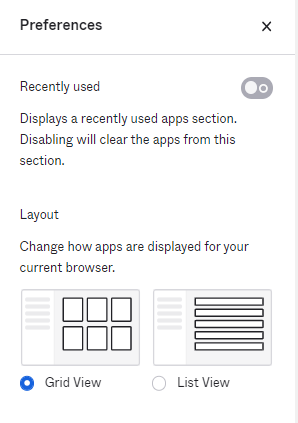
- Adjust the Pop up messages timer dropdown to customize how long pop up messages stay visible on the screen.
-
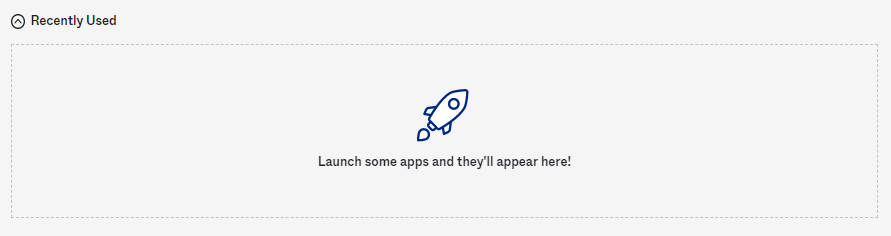
Toggle the Recently used option to enable the Recently Used section. When you use an application, it will appear in this section. This is a good option if you only use a small number of applications.
-
Under Layout, toggle between Grid View and List View to change how your TWDB applications display in the portal.
Example of Grid View:
Example of List View:
Update the name of the default section
-
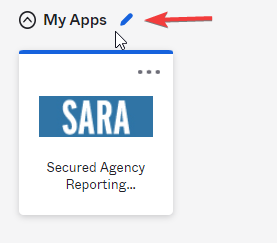
Hover over the My Apps section title. A little pencil icon should display, giving you the option to edit the section name. Click the pencil icon.
-
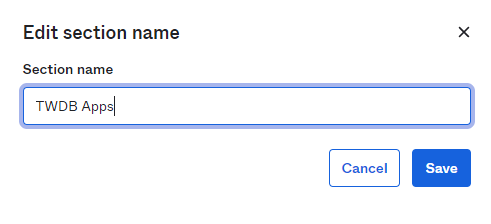
An Edit section name pop-up should display. Update the name and click Save.
-
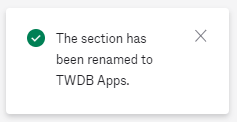
A success message should display in the lower right corner of the portal. The section should display with its new name in your portal.
Add a new section
-
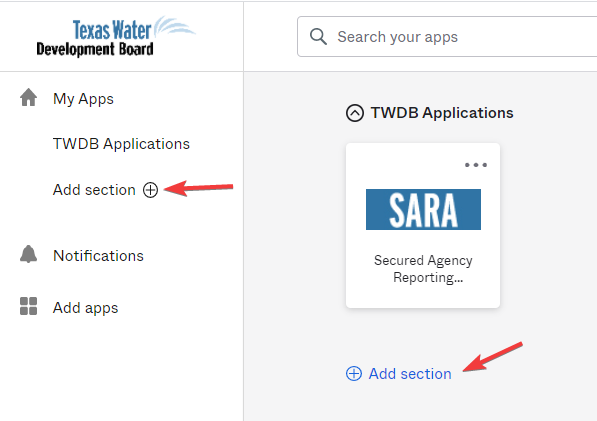
In the left-hand navigation menu, click Add Section. Alternatively, click the Add section link below your existing section.
-
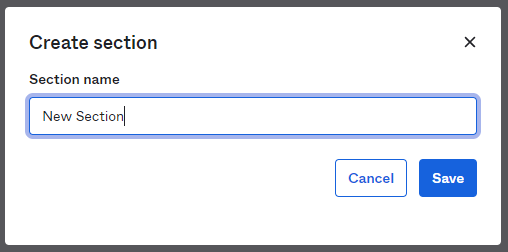
A Create section pop-up should display. Enter the desired name for the new section and click Save.
-
A success message should display in the lower right corner of the portal.

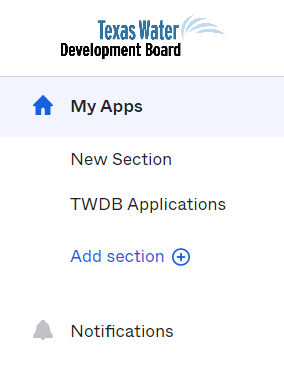
- The new section should display in your portal. A newly created section will not contain any apps. You can drag and drop any of your assigned apps between sections.
-
Note that sections display in order of creation, where the first section created displays at the top of your portal.

Rearrange sections
-
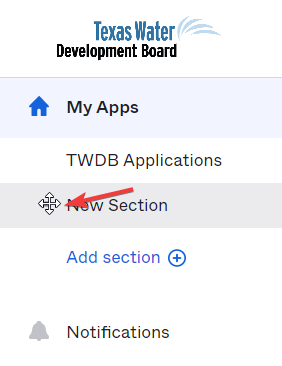
To change the display order of your sections, hover over the section name in the menu. The cursor should change from a pointer to a move cursor.
-
Using the move cursor, drag the sections to your desired configuration. The order of the sections in the menu dictates their appearance in your portal.
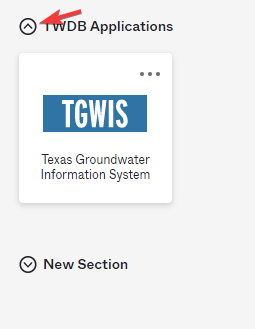
Minimize and maximize sections
-
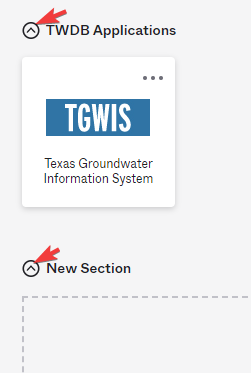
To minimize your sections, click the little arrow to the left of the section name.
-
When the sections are minimized, you will not be able to see any of the apps within the section.
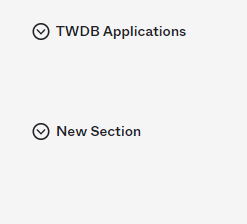
- To maximize or expand the section, click the same little arrow to the left of the section name. You can maximize the section that you use most often and minimize other sections to declutter your portal.
Remove a section
-
Before removing a section, you must remove all the apps from that section. Once all apps have been removed the Remove section option will display.
-
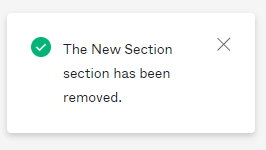
Click Remove section.
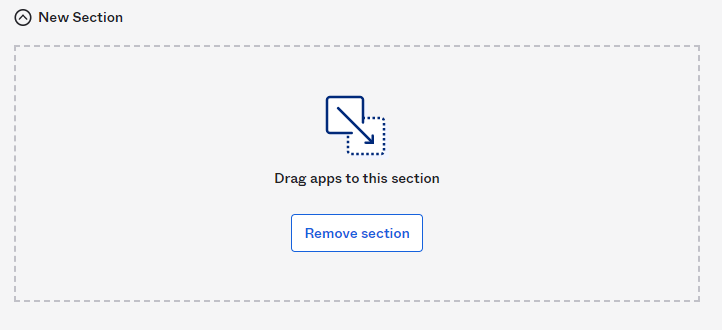
- A success message should display in the lower right corner of the portal. The section will be completely removed from your portal.
Sort applications
Use the Sort dropdown to the upper right of your portal to change how your apps are ordered in the portal. For all options other than Sections, your apps will display in the selected order and any default or custom sections will be removed.